We all love hard data. The facts and figures please. BUT those who really love data know that the secret sauce is to combine ‘hard’ data (quantitative) with ‘soft’ data (qualitative) to really understand the whole picture.
There are many qualitative survey tools on the market that can help you do just that. For this post, I’ll talk about Google Consumer Surveys (GCS) as it’s the tool I use most frequently, but there are many others that rank high in terms of ease of use, functionality, and data output (Qualaroo, SurveyMonkey, Foresee, and Opinion Lab, to name a few).
A couple of use cases are top of mind for me as a practitioner working with teams that are constantly launching new websites and updating offerings:
1. Task completion (tip of the hat to Avinash): was the website visitor able to do whatever they came to your site to do?
2. Satisfaction: how would the visitor rate their experience on your site?
3. Audience makeup: who is visiting your site?
Here is a quick example of setting up an audience makeup survey:
Great! You’ve set up a survey. Now on to running it.
If your website is using a tag management solution, implementation will be super quick and easy. If you haven’t yet joined the tag management fun, no worries! You can hardcode the survey code directly on your site.
Here’s a quick example of how I would set up my survey via Google Tag Manager (GTM):
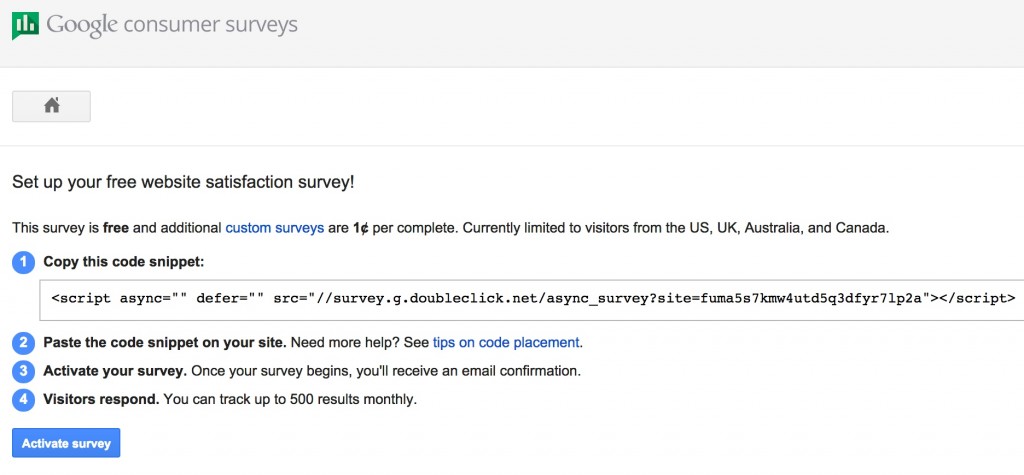
First, get the code snippet from GCS:
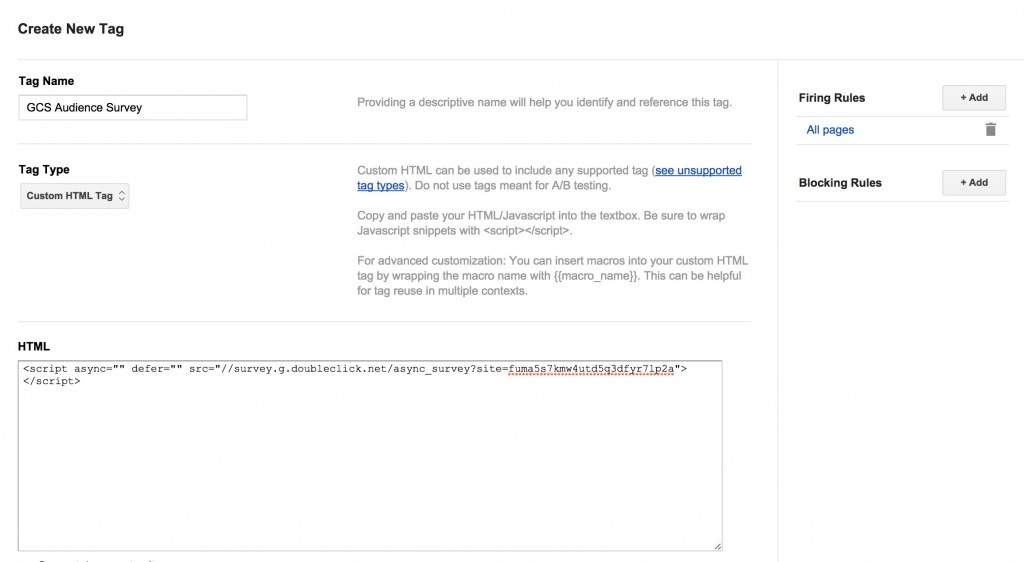
Then, create a custom HTML tag for the script in GTM and add firing rules:
Create a version & publish. Now your GCS script is live!
Amazing! You’ve launched your survey in just a few easy steps and are collecting the results. Actually, I’ve now launched this survey on this blog and am currently collecting results. I’ll come back in a few weeks to update you on what to do when your survey has finished running.
Step by Step: Setting Up a Quick Onsite Survey
We all love hard data. The facts and figures please. BUT those who really love data know that the secret sauce is to combine ‘hard’ data (quantitative) with ‘soft’ data (qualitative) to really understand the whole picture.
There are many qualitative survey tools on the market that can help you do just that. For this post, I’ll talk about Google Consumer Surveys (GCS) as it’s the tool I use most frequently, but there are many others that rank high in terms of ease of use, functionality, and data output (Qualaroo, SurveyMonkey, Foresee, and Opinion Lab, to name a few).
A couple of use cases are top of mind for me as a practitioner working with teams that are constantly launching new websites and updating offerings:
1. Task completion (tip of the hat to Avinash): was the website visitor able to do whatever they came to your site to do?
2. Satisfaction: how would the visitor rate their experience on your site?
3. Audience makeup: who is visiting your site?
Here is a quick example of setting up an audience makeup survey:
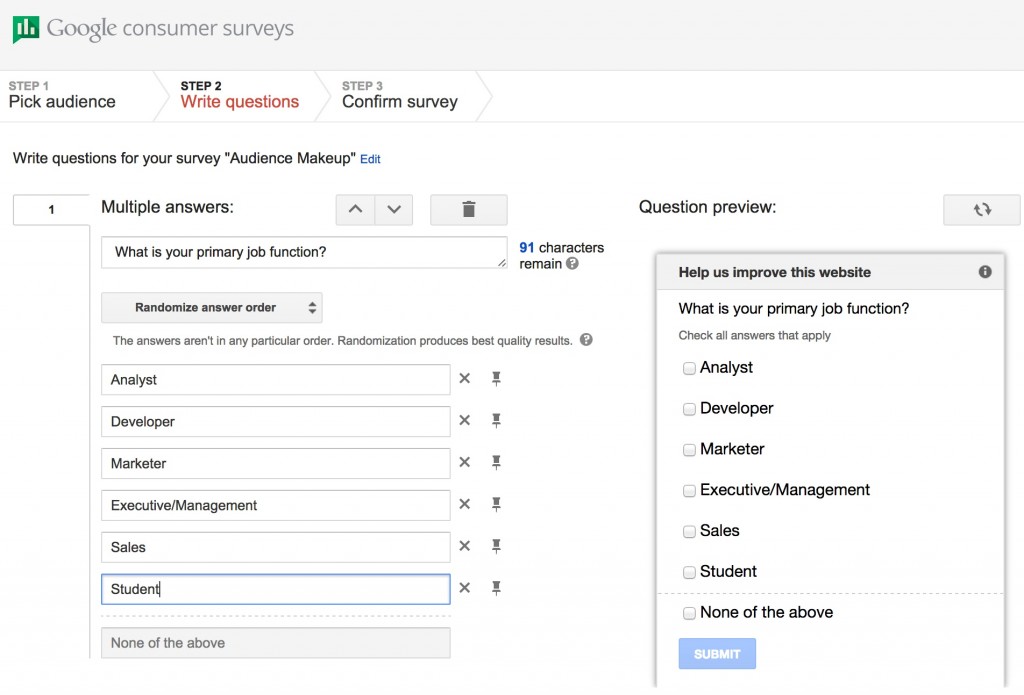
Great! You’ve set up a survey. Now on to running it.
If your website is using a tag management solution, implementation will be super quick and easy. If you haven’t yet joined the tag management fun, no worries! You can hardcode the survey code directly on your site.
Here’s a quick example of how I would set up my survey via Google Tag Manager (GTM):
First, get the code snippet from GCS:
Then, create a custom HTML tag for the script in GTM and add firing rules:
Create a version & publish. Now your GCS script is live!
Amazing! You’ve launched your survey in just a few easy steps and are collecting the results. Actually, I’ve now launched this survey on this blog and am currently collecting results. I’ll come back in a few weeks to update you on what to do when your survey has finished running.
Krista
You might also like
Step by Step: Setting up a GA4 Event Tag in GTM
Step by Step: Setting up a GA4 Config Tag in GTM
Goodbye, Google
GTM Analytics Academy Course Open Till July 24th!
Next ArticleJoin the DAA SF Symposium on Nov 13: Getting Data Right with Quant AND Qual!