Update: Setting up GA via GTM’s new UX
This post is essentially an update to the one I posted about a month ago for setting up Google Analytics via Google Tag Manager for WordPress (using Thomas Geiger’s Duracelltomi Google Tag Manager plugin for WordPress). Now that the beautiful new GTM interface has launched, things may look and feel a tad different, so read on for an updated step-by-step.
I’d also like to quickly thank my sister, Jilleen, who runs the awesome blog SoCal Field Trips, for unknowingly volunteering as an example for this post… did you think that blog help was free?! Love you sis!
Ok, now onto the useful stuff…
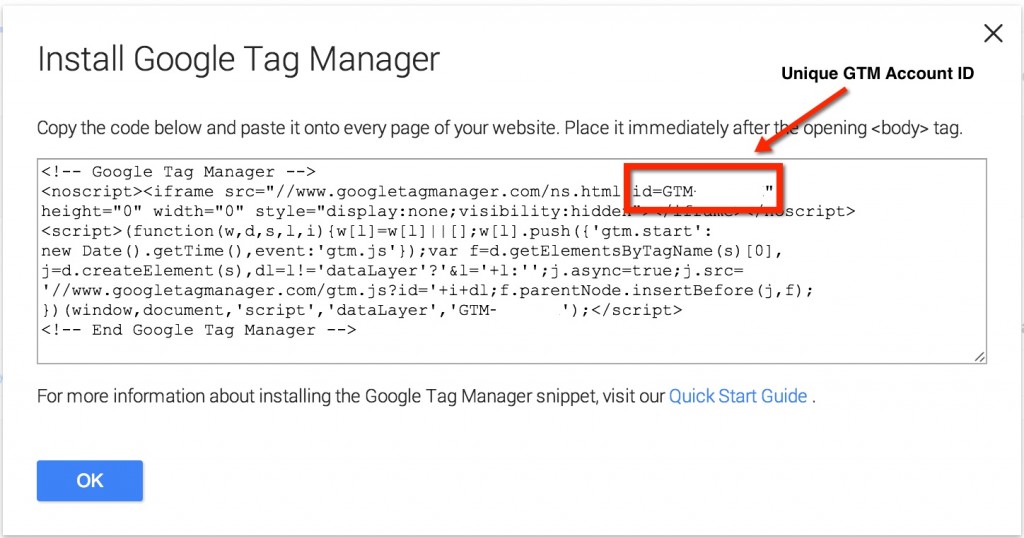
Step 1: Go to tagmanager.google.com (note that this link takes you directly to the new UX, whereas google.com/tagmanager will take you to the old interface) to create a GTM account. You’ll get a GTM account ID, in the format GTM-XXXXXX. Copy this ID, you’ll need it in the next step.
Step 2: Install a GTM wordpress plugin. As mentioned earlier, I again chose Thomas Geiger’s Duracelltomi Google Tag Manager plugin for WordPress because it has great reviews on WordPress and a dedicated site full of ‘how to’ resources. Once installed, enter your GTM account ID.
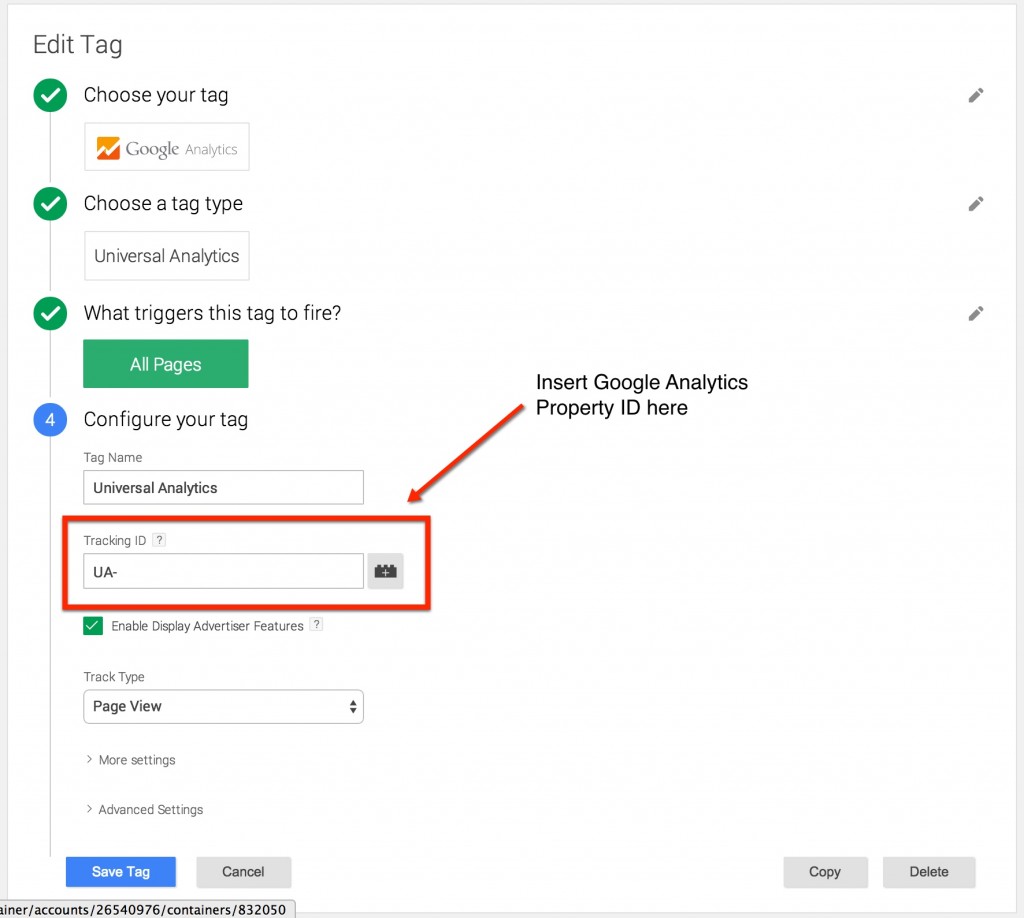
Step 3: Configure your tags, triggers*, & variables* in GTM. The first thing I installed was a Universal Analytics tag to fire GA on all pages of my site. For basic tracking, it’s pretty easy. Just choose the tag type (in this case, the Google Analytics Universal Analytics tag template), enter your tracking ID (this is the property ID from Google Analytics), choose what triggers to fire on (All Pages), select the track type ‘Page View’, and then click ‘Save tag’.
Quick note about basic triggers – in the new UI you do not have to add them separately, each tag asks what triggers to fire on which simplifies this process and removes a step for the user. Awesome.
* ‘Triggers’ is the new terminology for the feature formerly known as ‘rules’. Likewise, macros have become ‘variables’.
Step 4: Preview & debug the tag you just created. Click on the ‘Publish’ drop down menu in the upper right hand corner (Preview, Debug, Create Version and Publish now all live under the same drop down rather than as separate buttons), then ‘Preview’ from the drop down panel. Once in Debug mode, open a new tab and load your website. You should see the debug panel on the bottom of the screen which will show you which tags are being fired. The tag you just added should show up here.
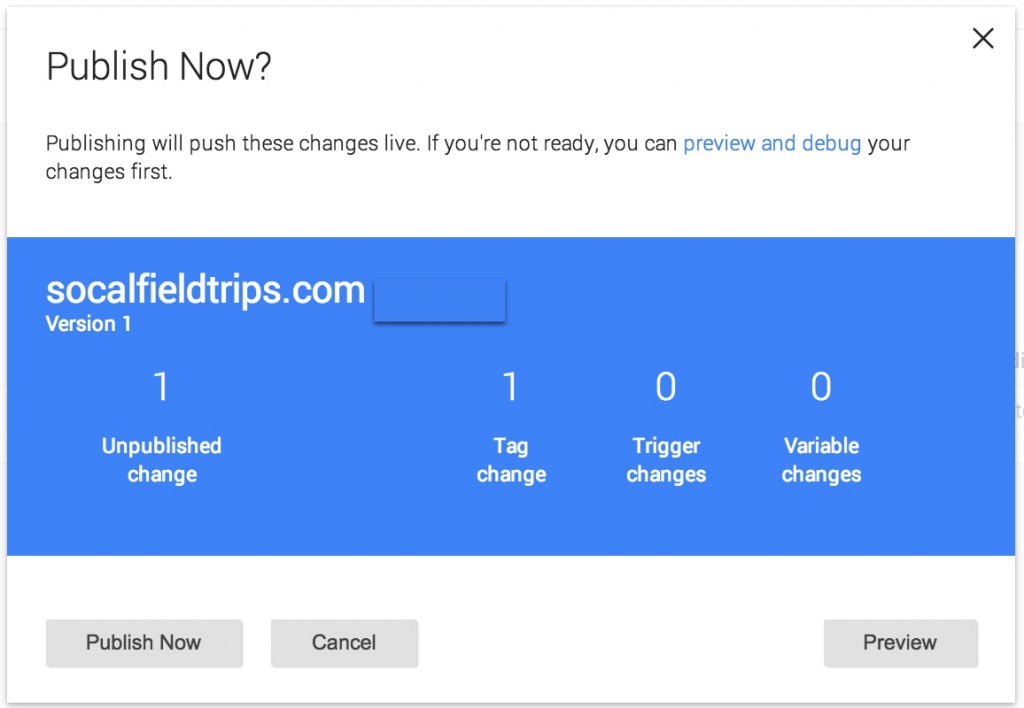
Step 5: Once you’ve verified that your tags are firing as intended via the Preview and Debug mode, it’s time to publish. Another nice thing about the new interface is that you don’t have to go through the step of creating a container version before publishing, by clicking publish it will do this for you! Yay, another step removed from the process.
That’s it, 5 even easier than before steps to install Google Analytics via Google Tag Manager on your WordPress blog. For more information about tag, trigger, & variable creation, check out the GTM help center.


Petar
Thanks a lot. Exactly what I needed today 🙂
Pingback: #GTMtips: Migrate Containers To New UI - Simo Ahava's blog
Les
Nice overview Krista. Might I add that this is a great time to create a macro that generates your UA account number right off the bat. I have seen a few GTM installs where a manually added UA number was incorrect on a Tag or two.
bloggerchica
Agreed! And just posted – great minds think alike 🙂
Stefan
Tx a lot – I was also studying the lessons on https://analyticsacademy.withgoogle.com/course05/unit?unit=3&lesson=1 but somehow I’m not able to pass data from the dataLayer variables into GA.
Duracelltomi’s plugin provides some additional data, such as pagePostAuthor, which would be great to have in GA reports as well.
I had tried to configure this value as an additional dimension, but in GA it’s not showing any values…
In GA I have set up a custom dimension on index 1. In GTM I created a DL variable (version 2) using “pagePostAuthor” for both title and DL variable value. Last, I had added a custom dimension on index 1 with value {{pagePostAuthor}} in the tag which is calling GA/UA.
In preview mode I can see the data being passed, but it doesn’t show up in GA.
Unfortunately I’m not able to post in the GTM Fundamentals Group, so I’m trying here as I had found the links to this blog there…
Stefan
Just took a few hours until it showed up in GA… so everything’s fine and working…
Pingback: Digital Debrief – Step-by-Step: QA Your GTM Container with Preview and Debug Mode