Step-by-Step: New Element Visibility Trigger
As I mentioned in my post on the New Scroll Tracking Trigger, Google Tag Manager has just launched 2 new, exciting triggers. The second of those is one called ‘Element Visibility’.
Depending on your use cases, this is likely even more exciting than Scroll Tracking (although I’d say that one was pretty damn exciting considering countless people have spent hours upon hours come up with technical solutions, blogging, and speaking about something as simple (in concept) as Scroll Tracking).
With Element Visibility, you can now trigger a tag to fire based on an element on your site being in the viewport. You can specify the percentage of pixels that must be in the viewport (ex. 50% of the element’s pixels must be visible to count, a standard in viewability today), when this should fire (once per page, once per element, etc), and for advanced settings, you can also specify a minimum number of milliseconds the element must be in the viewport before triggering the tag. And you can set these triggers up to work on either an Element ID, or CSS selectors. SO MUCH POSSIBILITY!
I’ve done a step by step for a simple use case, but this new trigger can (and certainly will) be used for some pretty awesome stuff, I’m sure. For my example, I want to fire a Google Analytics Event tag when my ‘Subscribe to Newsletter’ box is visible in the viewport for more than 2 seconds (2000 milliseconds). The business use of this is pretty straight forward, I want to see how often the subscribe box is in a noticeable position on my site, and then calculate a subscription rate (essentially using my Subscribe event as the numerator and the Subscription view event as the denominator). I’ll also use this over time as I play with this Subscribe box to see how I can impact my Subscription to Viewability rate.
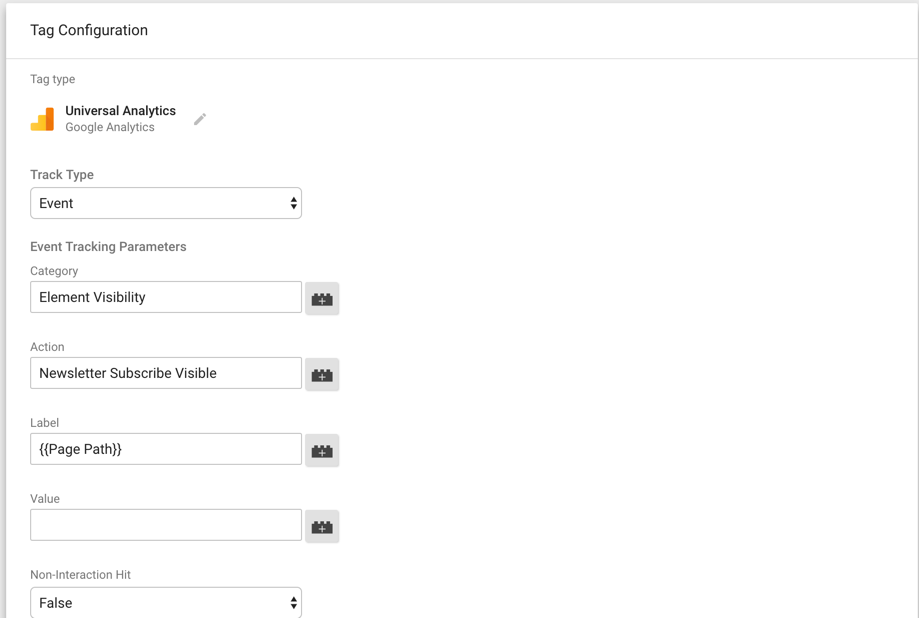
Step 1: Create a new Universal Analytics Event Tag (and name it something like GA – Event – Newsletter Element Visibility)
Step 2: Set your Category, Action, and Label
For my site, I’ve chosen:
Category: ‘Element Visibility’ in order to roll it all into one category and not pollute other category sets with this data since it has the potential to be noisy
Action: Newsletter Subscribe Visible – clearly stating what element is visible. I can use this same naming convention for elements as I implement further.
Label: {{Page Path}} – this is a built-in variable in GTM. I’ve chosen Page Path so that I can easily see which page a user was on when scrolling to then analyze engagement by page. Since my blog posts all have individual page URLs, this works well.
Step 3: Add the Element Visibility Trigger
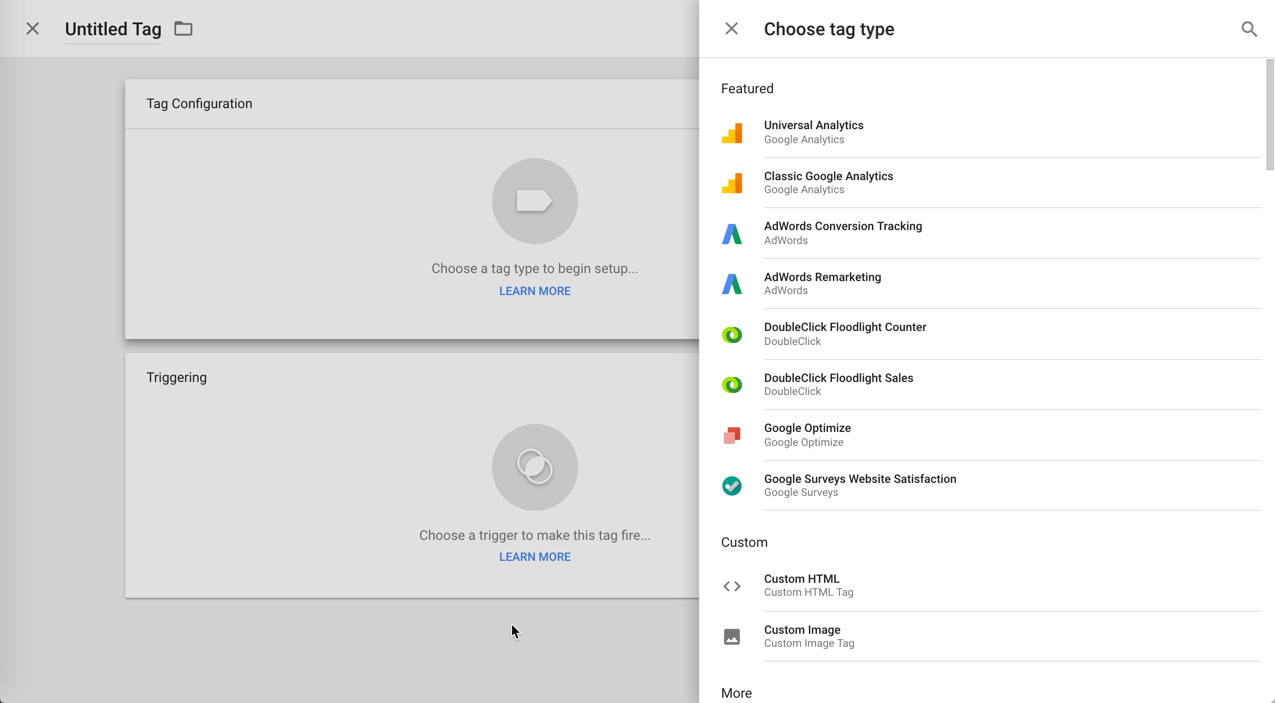
Now that I’ve configured my event tag, I need to add the Element Visibility trigger. Click to create a new trigger, and in the slide out, you’ll notice a new Trigger for ‘Element Visibility’ (and also another new trigger for ’Scroll Tracking’ – as I mentioned above, this is equally as exciting 😃 )
Step 4: Configure the Element Visibility Trigger
First, I’ve given my trigger a name of ‘Element Visibility – Newsletter’ to be clear exactly what these settings are meant to fire on. Then, in the configuration settings, you can choose to trigger based on an ID or a CSS Selector. For my site, I’ve chosen ID, because it’s pretty easy to get the Form ID on my Subscription form. I’ve entered the identifying ID in the Element ID field.
I’ve chosen to fire this ‘Once per page’, because I only want to see de-duped data for each page. For viewability, I’ve chosen to leave the default of 50% minimum viewability. Finally, under Advanced settings, I’ve chosen to ‘Set minimum on-screen duration’ and set this to 2000 milliseconds (2 seconds) to ensure it’s not firing just if someone scrolls quickly by. I actually played around with this duration why testing it, finding that 1000 milliseconds was too short, and longer felt just a bit too long to not count as visible.
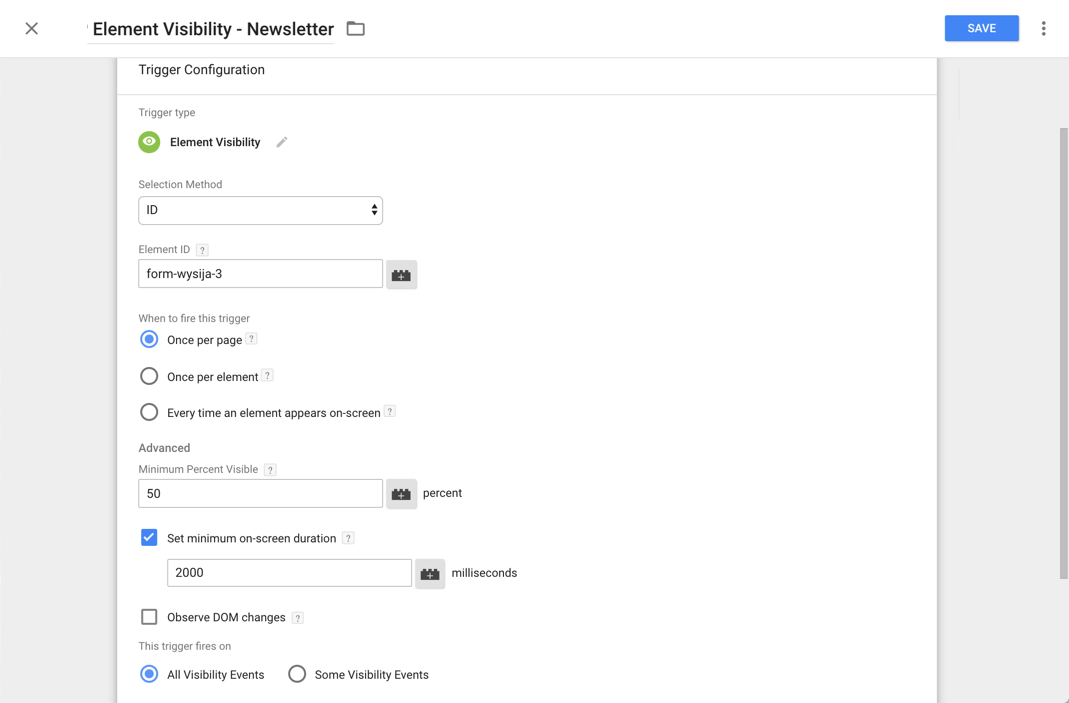
My final Tag and Trigger setup looks like so:

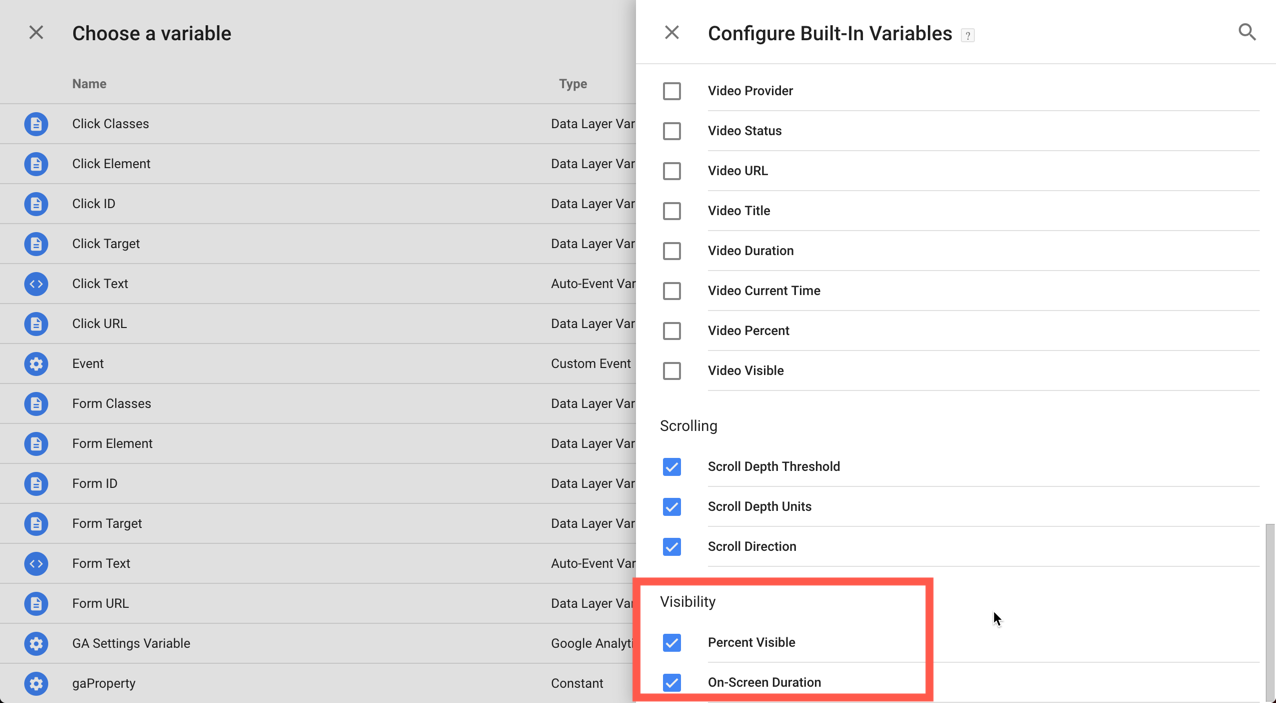
Note: There are also 2 new Built-In Variables released with the Element Visibility trigger, ‘Percent Visible’ and ‘On Screen Duration’ that you can use throughout your setup:
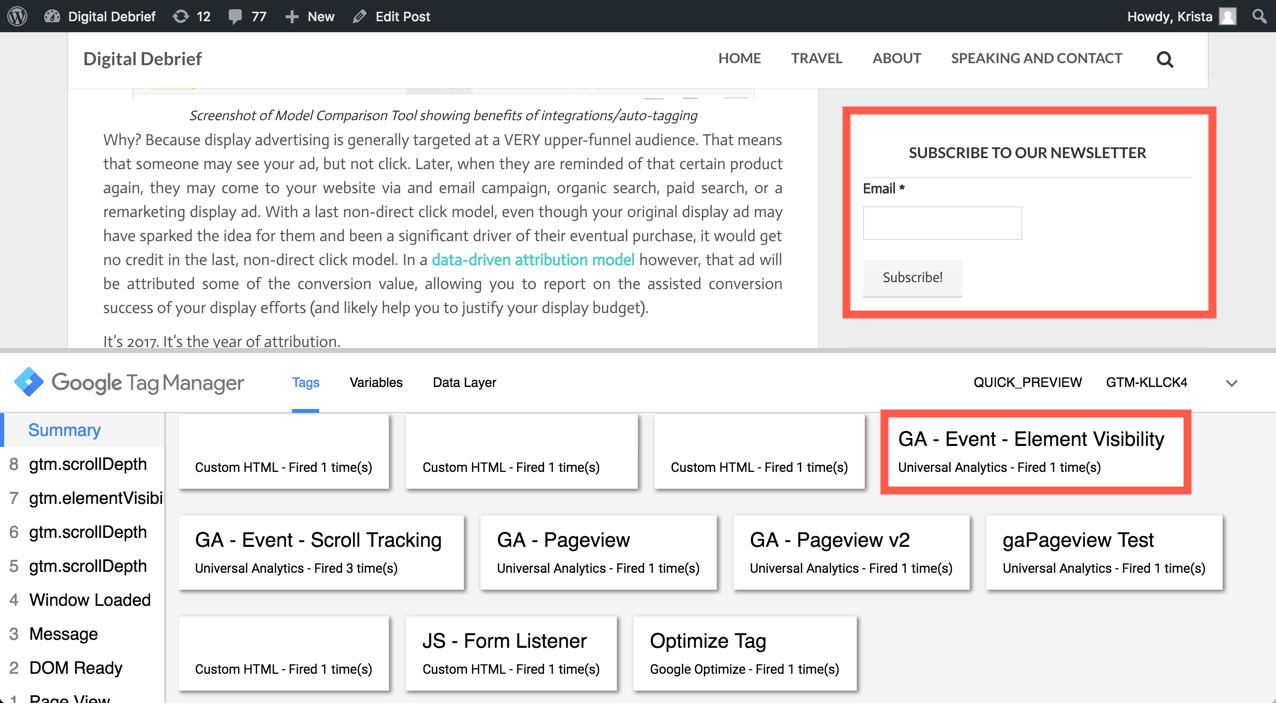
Step 5: Preview & Debug
Now it’s time to test this out via Preview & Debug! I’ve put GTM into Debug mode and gone out to my site. As you can see, I’ve got several tags that are firing on the page, one of which is the Element Visibility tag I’ve just made (firing only after I’ve lingered for 2000 milliseconds):
Digging in I can see the Category/Action/Label I’ve specified:

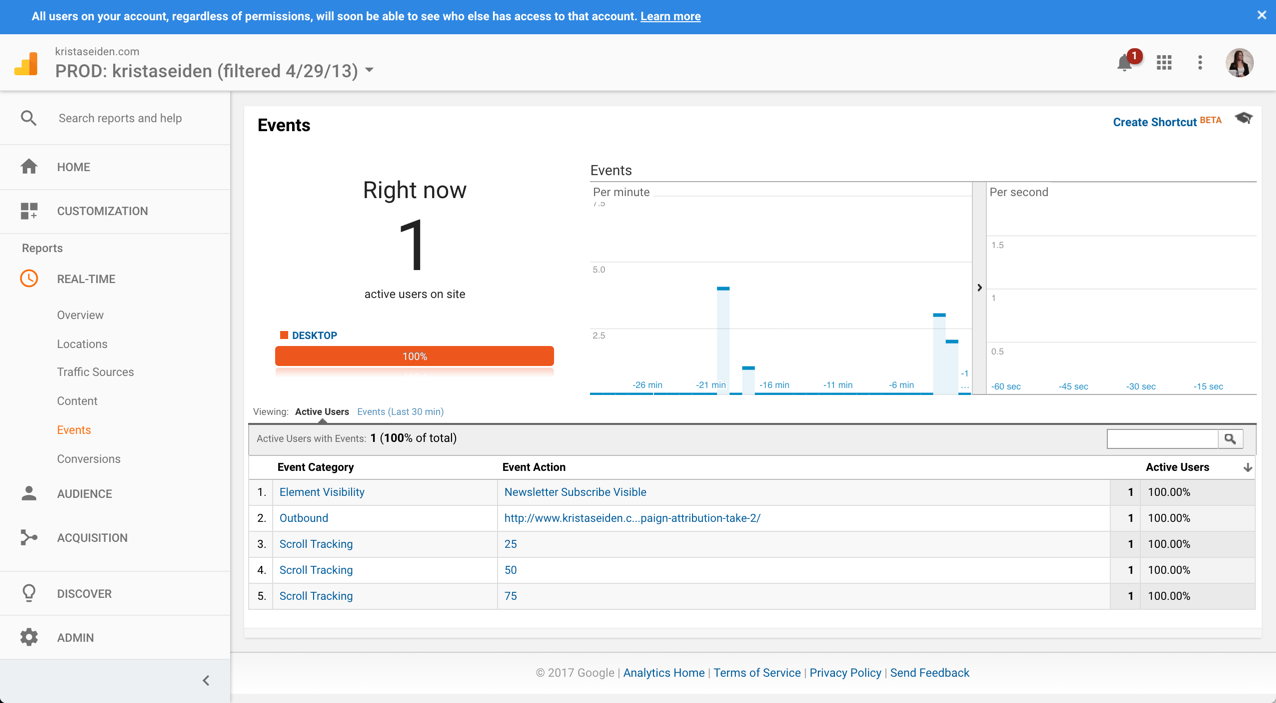
Finally, I checked this out in Google Analytics Realtime event reporting just to be sure it was capturing as intended:
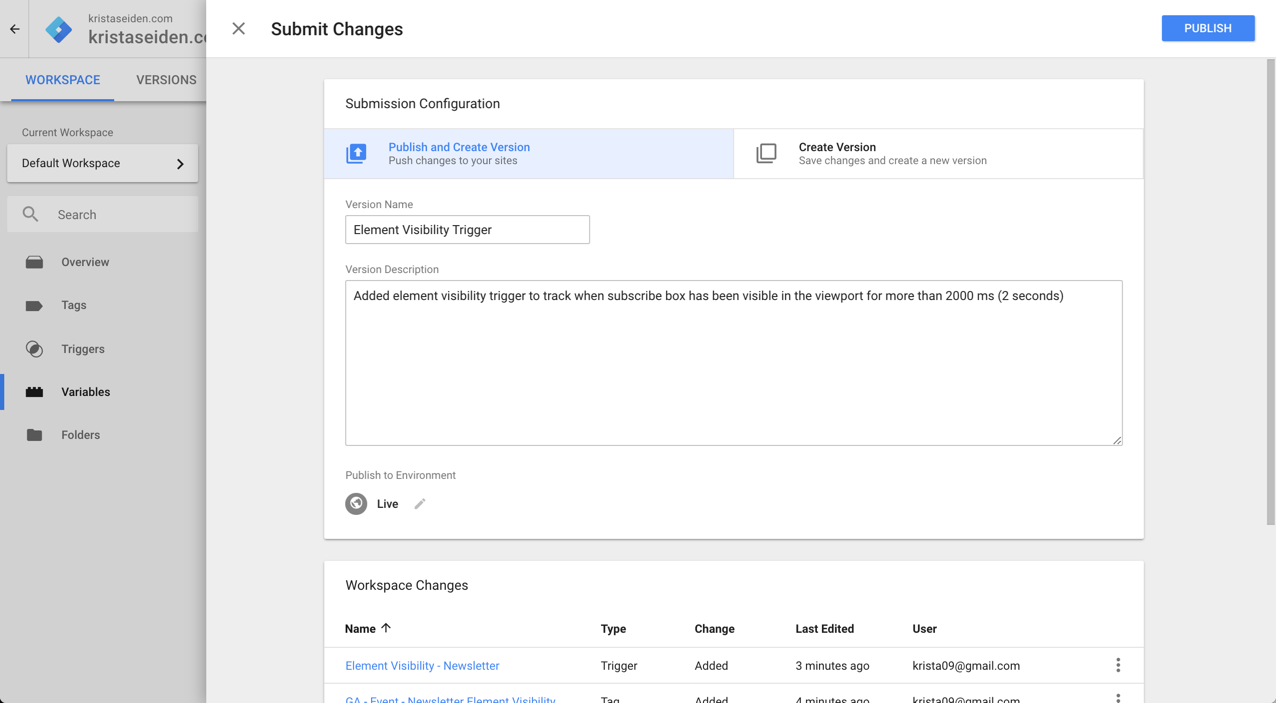
Step 6: Launch!
I’ve made a quick note in the Version history notes what this launch was for, and then published my new container version with all the updates I’ve just made to track Element Visibility of my Newsletter Subscribe box:

Mark Taylor
Hi Krista – great post. We implemented scroll tracking someone ago and the data it gave enabled us to increase conversion by 12.2%. We just implemented the element visibility tracker and after a day it’s giving us so much insight, there are area of the page that people are zooming past and others that are really sticky. Almost better than a heat map!
Pingback: Googleタグマネージャに新機能:要素の表示が測定可能に - 江東区の片隅