Step-by-Step: New Scroll Depth Trigger in Google Tag Manager
How far down my page did users go? Did they actually see the content below the fold? <— Said every executive ever to every analyst ever
Scroll depth tracking has always been somewhat of a pain to setup in Google Analytics. Sure, there are guides like this one from Justin Cutroni, and there are WordPress plugins, but let’s be honest, until now, there haven’t been any good solutions to easily do this in Google Analytics. It’s required a ton of code and a developer to implement. Until now being the important words in that sentence…
Google Tag Manager has just released a few new triggers, one of which is called “Scroll Depth” (and I can’t be more excited!!). This trigger allows you to easily setup a tag to track the scroll depth in Google Analytics (and in fact, in any tool you’re sending data to from GTM since it’s a trigger and not tied to a specific tag type).
I set this up on my site in about 5 min (ok, maybe 1 or 2 min longer because I stopped to take several screenshots to share below).
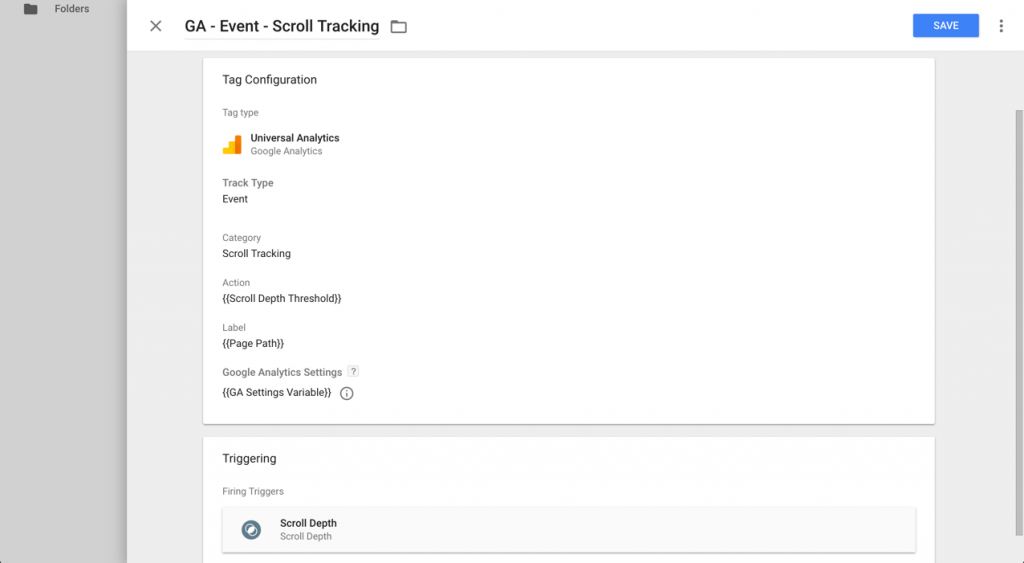
Step 1: Create a new Universal Analytics Event Tag (and name it something like GA – Event – Scroll Tracking)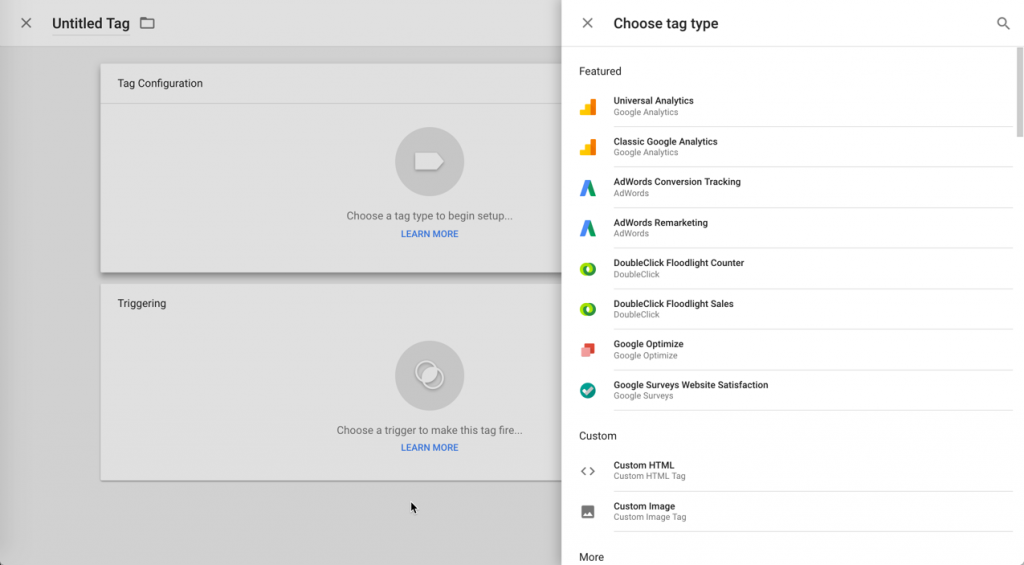
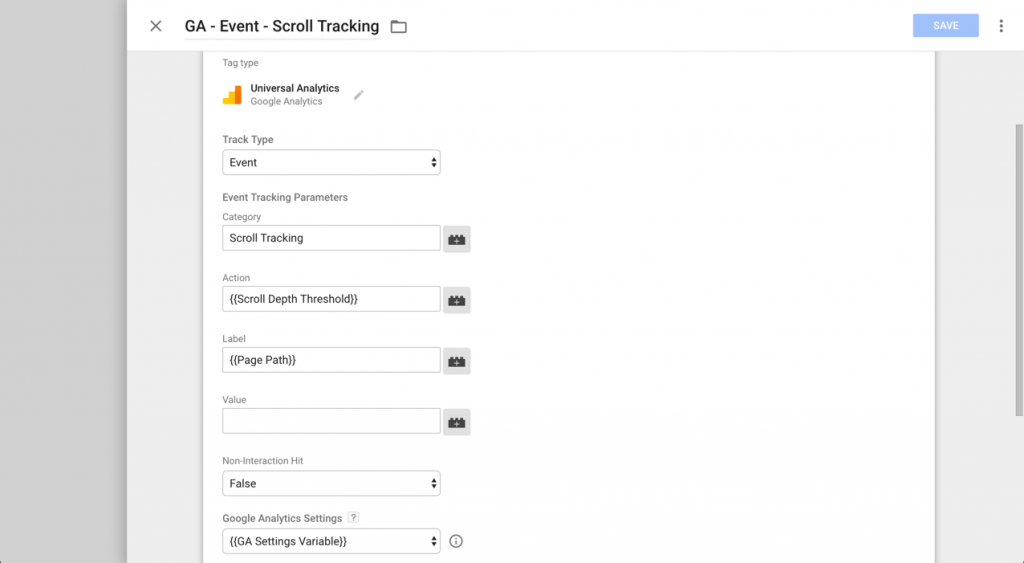
Step 2: Set your Category, Action, and Label
For my site, I’ve chosen:
Category: ‘Scroll Tracking’ in order to roll it all into one category and not pollute other category sets with this data since it has the potential to be noisy
Action: {{Scroll Depth Tracking}} – this is a new variable available in the Built-In Variables settings, more on that below
Label: {{Page Path}} – this is also a built-in variable. I’ve chosen Page Path so that I can easily see which page a user was on when scrolling to then analyze engagement by page. Since my blog posts all have individual page URLs, this works well.
Step 3: Enable new Built-In Variables for Scrolling
You can configure the Variables you have available for use in the ‘Variables section by clicking ‘Configure’ and checking each Variable you want to be available for use within your tags. In this case, all three Variables related to Scrolling are new, and I’ve selected all of them to be available for use in my tags.
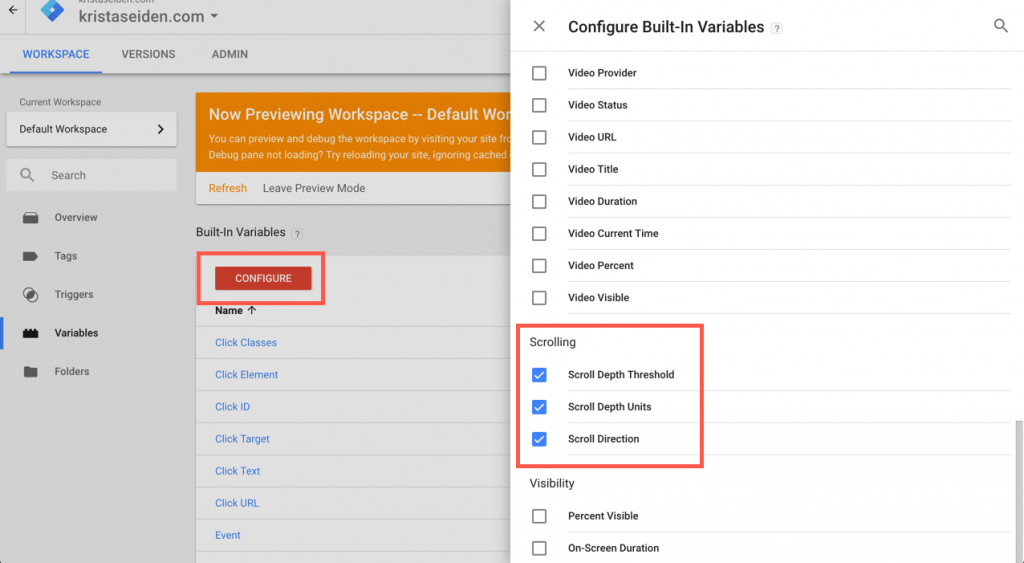
Step 4: Add the Scroll Depth Trigger
Now that I’ve configured my tag and my Scrolling Variables as part of my event tag setup, I need to add a trigger. This is where the magic really happens. Click to create a new trigger, and in the slide out, you’ll notice a new Trigger for ‘Scroll Depth’ (and also another new trigger for ‘Element Visibility – equally if not more exciting, more on that in a later post).
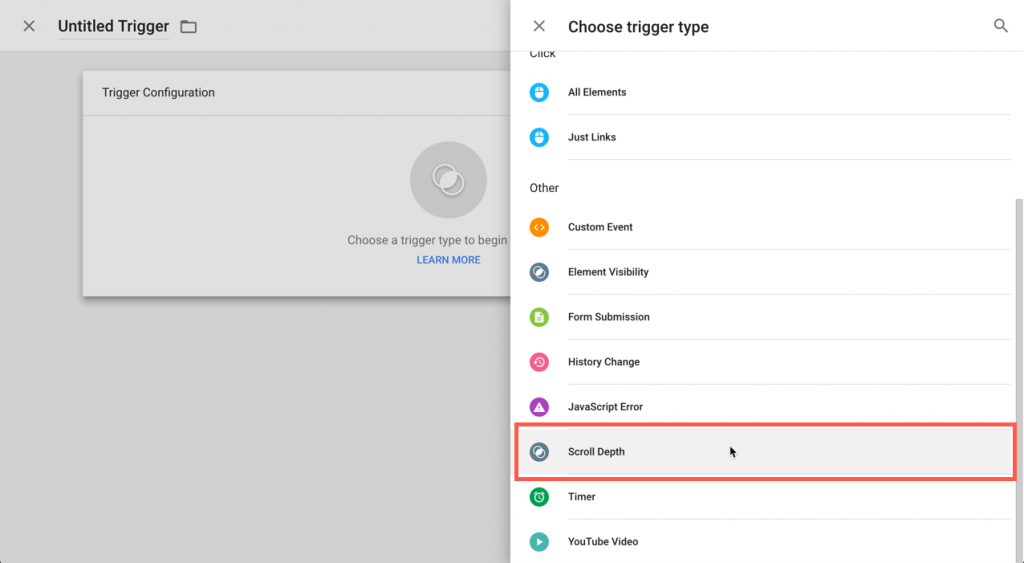
Step 5: Configure the Trigger for Percentage Scroll
Next you’ll need to configure this Trigger. I’ve named it ‘Scroll Depth’ to keep things simple (if this is specifically for GA, you may want to append a GA to the beginning of the Trigger name, but since this is my only Scroll Depth tag for now, I’ll leave it like this).
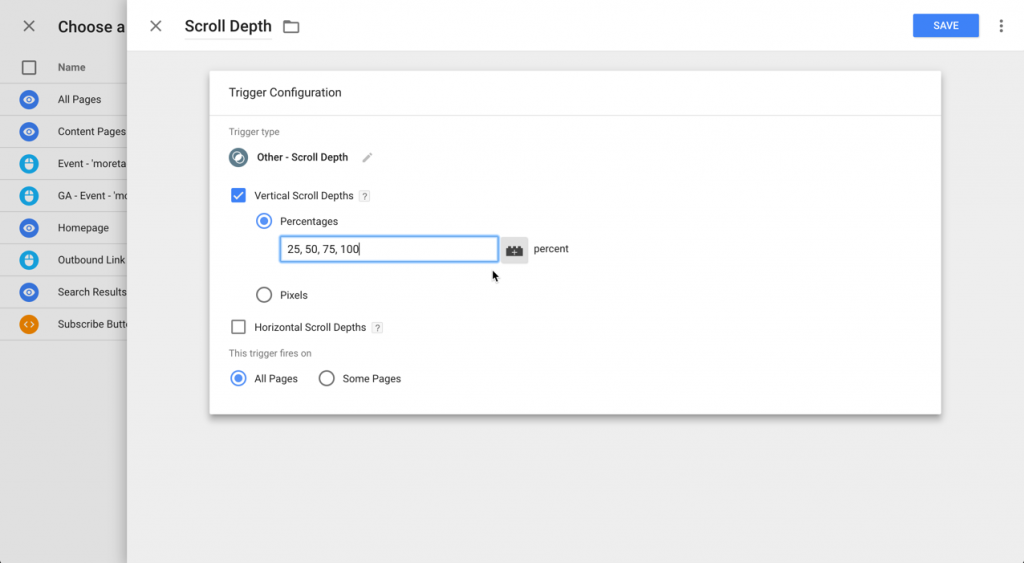
You’ll have a choice between Vertical Scroll Depth and Horizontal Scroll Depth and which pages to fire on:
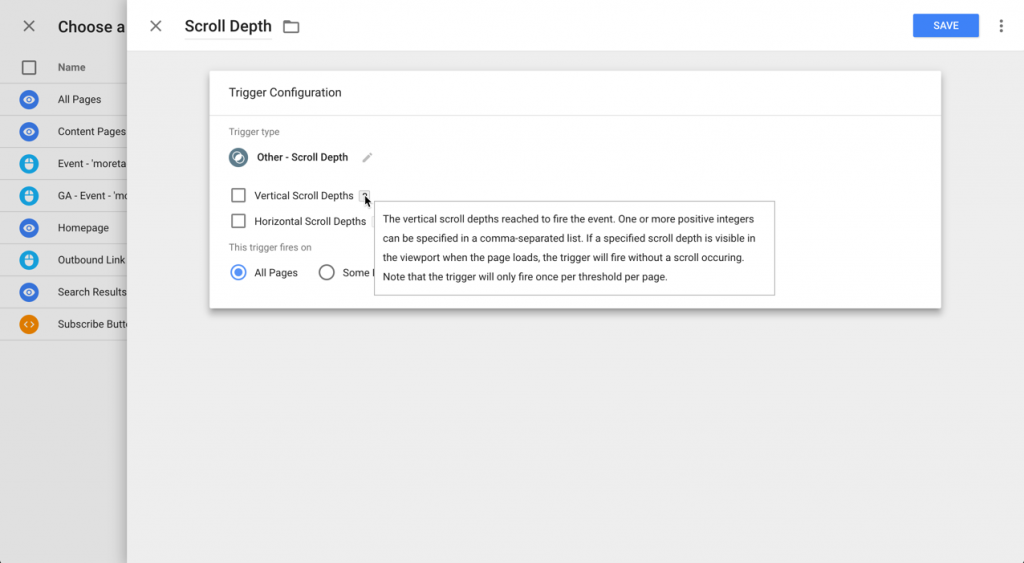
In this case I’ve chosen ‘Vertical Scroll Depths’. By doing so, I have expanded choice to either name my percentages or pixels, or to use a Variable in this field. In this case, I’ve noted 25, 50, 75, and 100 percent as the depths I’d like this Trigger to fire:
After saving and applying the Trigger, my final event tag looks like so:
Step 6: Preview & Debug
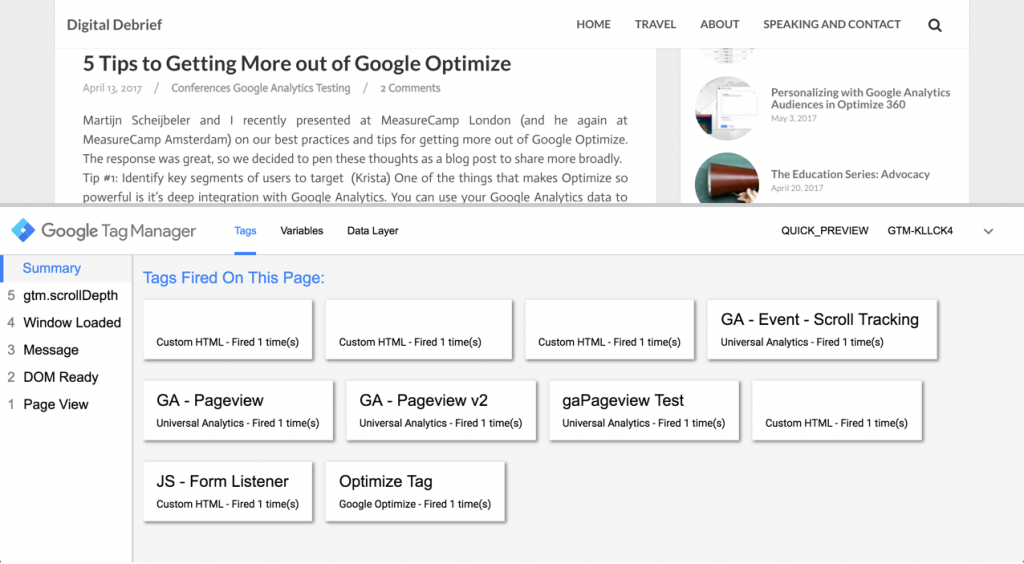
Now it’s time to Preview & Debug! I’ve put GTM into Debug mode and gone out to my site. As you can see, I’ve got several tags that are firing on the page, one of which is the Scroll Tracking tag I just made (firing at the 25% scroll marker):
When I click into to that tag chip, I can see the details being passed to Google Analytics. In this case, I see my Category, Action, and Label firing just as intended, excellent!

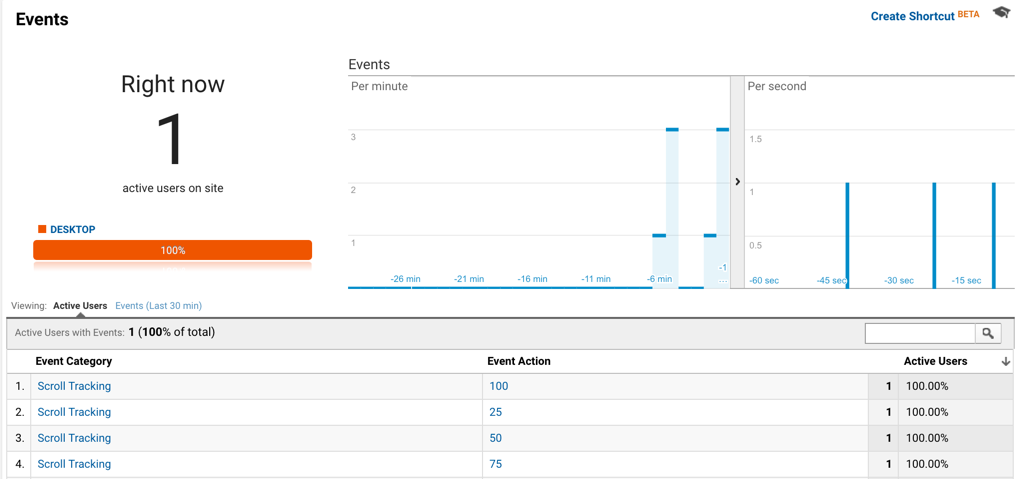
I continued scrolling to ensure that all 4 events fired, and immediately check real time analytics in GA to see that those events did indeed fire and collect data as expected. In this case, all looks good!
Step 7: Launch!
The last step is just to save and publish the new tag. That’s it! It’s now super simple to setup Scroll Tracking on your websites with this new Trigger available now in Google Tag Manager.
Pingback: Digital Debrief – Step-by-Step: Element Visibility Trigger
Pingback: Googleタグマネージャに新機能:スクロール量が簡単に測定可能! - 江東区の片隅
Pingback: Content Marketing Analytics: 11 Ways Data Can Inform Your Content Strategy – Alex Birkett
Pingback: How to Improve Your Content Marketing Using Digital Analytics | Domain Industry News
David Attard
Hi Krista,
is there some way we can do this with Google Analytics without going through Tag Manager? I’m assuming this is more Analytics functionality or is it a combination of GTM and GA?
I’ve been trying to kill as many scripts as I can from my site and would rather avoid adding the GTM just to enable this functionality.
Krista
Hi David,
This is specifically for GTM. Using GTM is actually a great way to kill a lot of individual tags on your site since you could run them through Tag Manager. Justin Cutroni writes about how to do scroll tracking without GTM (http://cutroni.com/blog/2014/02/12/advanced-content-tracking-with-universal-analytics/), but this will definitely add a lot of code to your site. If you’re interested in learning more about GTM, I’d suggest checking out the Tag Manager Fundamentals course on Analytics Academy (http://analyticsacademy.withgoogle.com/)
Best,
Krista
David Attard
Thanks Krista, I’ll check both out and see what works best for me – thanks again!
David
Pingback: How to Capture Email Leads (using Journalism’s 5 W’s technique) – Alex Birkett
Miguel
Thanks for this!
I’m wondering how is it possible to get an average out of this? For example see how many people scrolled past 50% Do you have to create custom metrics for that?
Krista
You could, or you could do the math separately as needed, should be fairly straight forward to calculate (total scroll 50%+ divided by total users)