Step by Step: Using GTM Workspaces
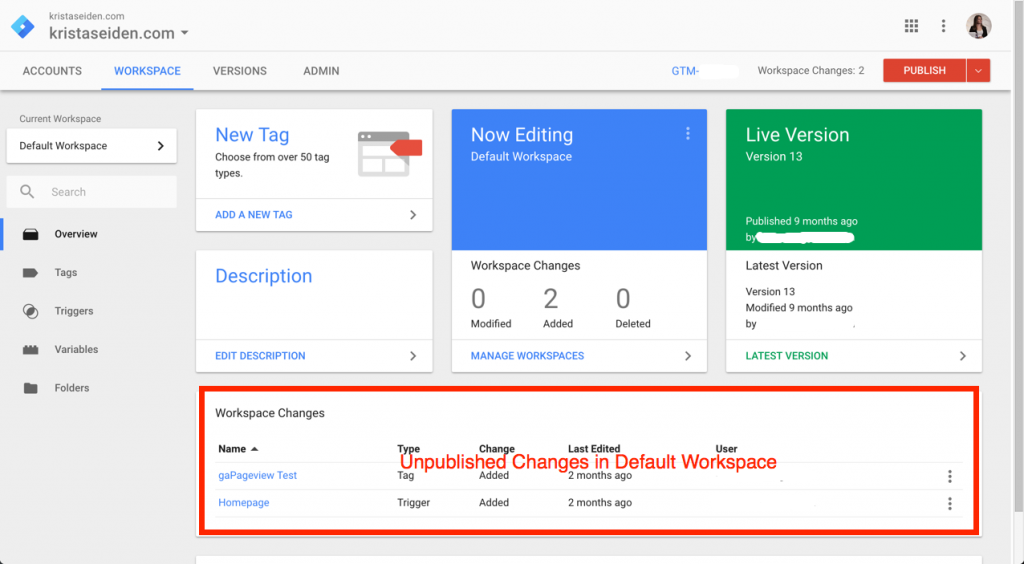
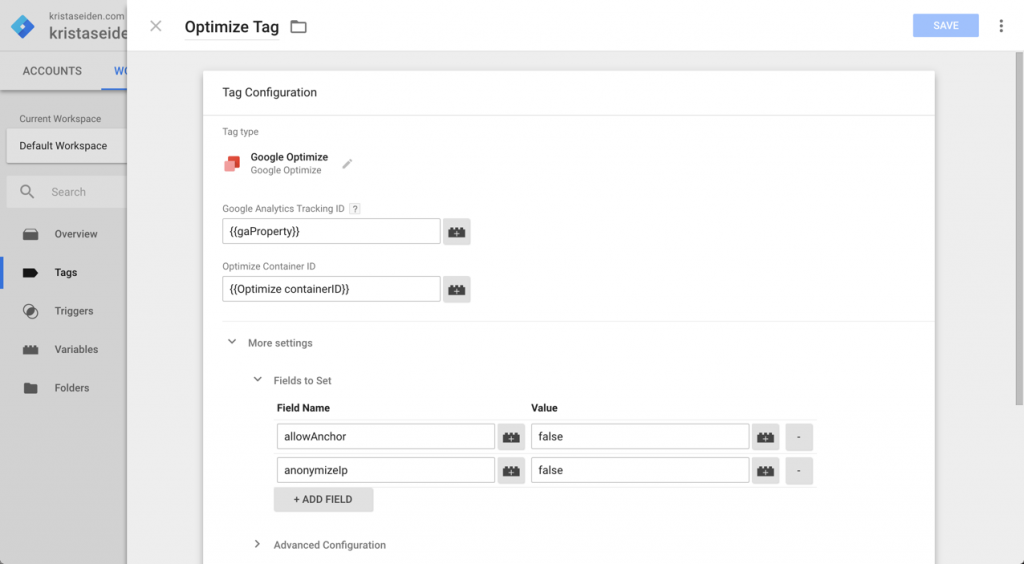
There are many use cases you may want to explore for GTM Workspaces (see the HC article here), but I wanted to take the opportunity to run you through a simple one: I have some edits in progress in my container that I’m not ready to publish, but I need to launch a new tag to add the Optimize code snippet to my website. This is a perfect use case for using a Workspace in Google Tag Manager.
Step 1: Create a new Workspace
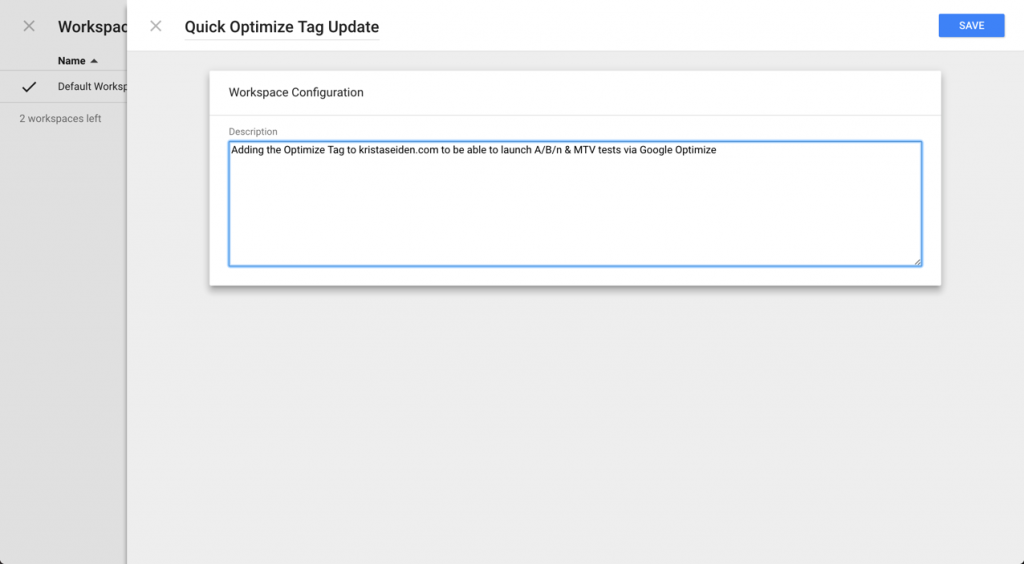
To create a new workspace, on the left hand nav, click into the place that says ‘Default Workspace’. This will open a slider showing your current workspaces, and on the top right hand side there is a blue plus arrow. Clicking it will open an additional slider where you can name and create your workspace. In this case, I’ve called it ‘Quick Optimize Tag Update’ to be clear about what I’m doing in this workspace. I’ve also given it a description to notate exactly what I’m doing in case others in the account are curious what this update is about.
Step 2: Make your tagging updates in the new Workspace
Once you click save, you’ll be dropped into the new workspace showing no changes that have currently been made. Go ahead and make your tagging updates in the new workspace the same way as you would in any other workspace.
Step 3: Preview, Debug, and Publish
When you’re ready to debug, go ahead and preview & debug your changes. Once you’ve ensured your new tags/triggers/variables are working as intended, go ahead and Publish as you normally would. Note that when you hit publish, you will be automatically creating a new version and the workspace will be removed.
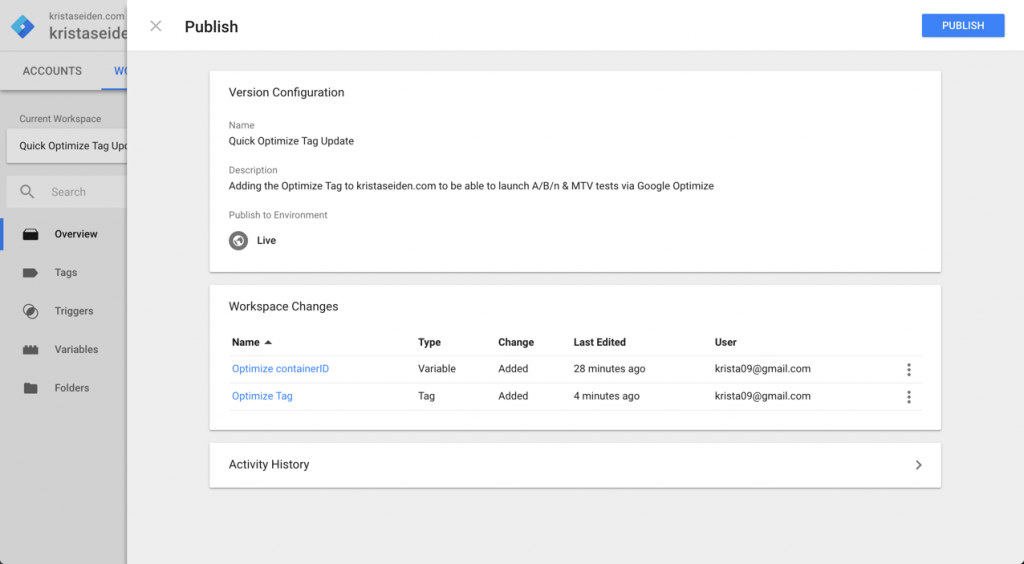
Step 4: Update versions
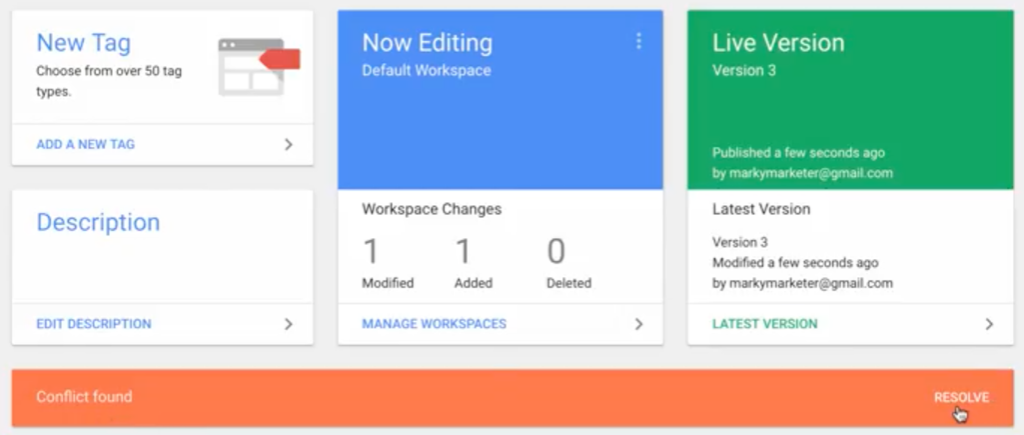
After publishing, you’ll see a notification at the bottom of your screen asking you to update your workspace to the new version since you’re now out of sync.
When you click it, you’ll see something like this:
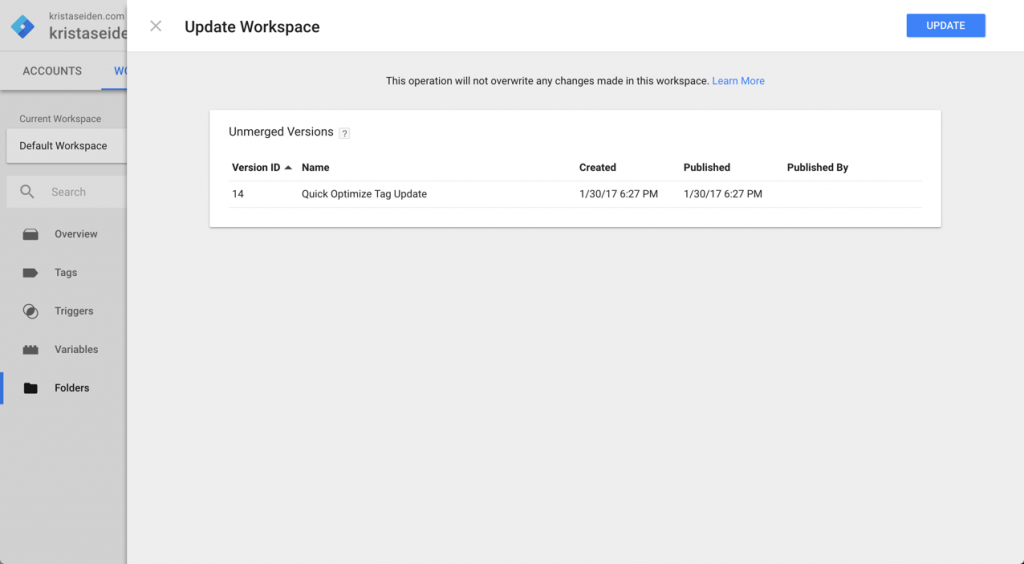
Step 5: Resolving Conflicts
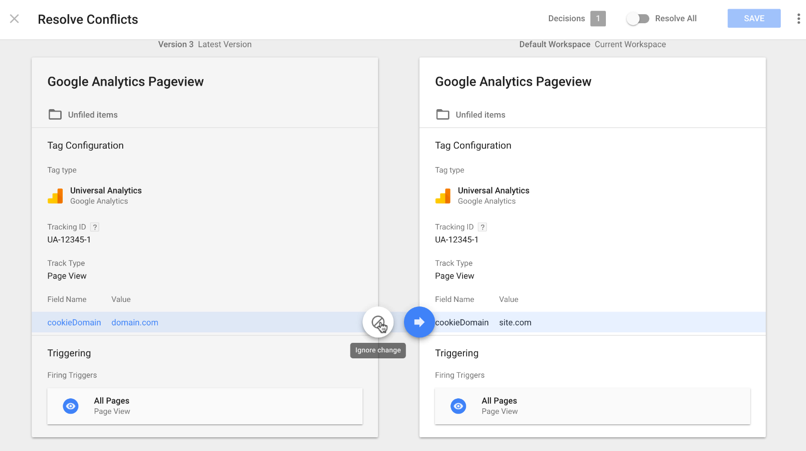
If you have any conflicts between workspace versions (differences from the last published version, as in the screenshot below), Tag Manager will let you know by showing you an orange bar noting there are conflicts.
Once you click resolve, you’ll be taken to a conflict resolution screen. At that point you can choose to either except the changes as you’ve made them in the newest version just published, or ignore the changes and default to the previously published versions of the changes in conflict. You can read more about this process here.
That’s it! It’s super easy to use a new workspace to launch a tag, trigger or variable when you have other edits still in progress that are not ready to launch in another (or default) workspace. This is especially great if you have multiple editors or teams involved in the management of your container, because now you don’t all have to be ready at the same time to launch a new GTM container version 😃

Pingback: Analytics Update 2 - Peaks & Pies
Pingback: Analytics Update 2 - Columbo.io